Example Lead Paint Projects in Hayward

Six examples follow, from a test before an addition to a leaking rental unit, each with the house, the test result, the work and a rough price.

These are examples, not past jobs, clients or addresses. They reflect East Bay house ages, the steps lead work follows here and 2026 price ranges, so you can get a feel for a job before asking for a quote.

Peeling porch columns and roof edge stripped on a 1920s bungalow

Example project
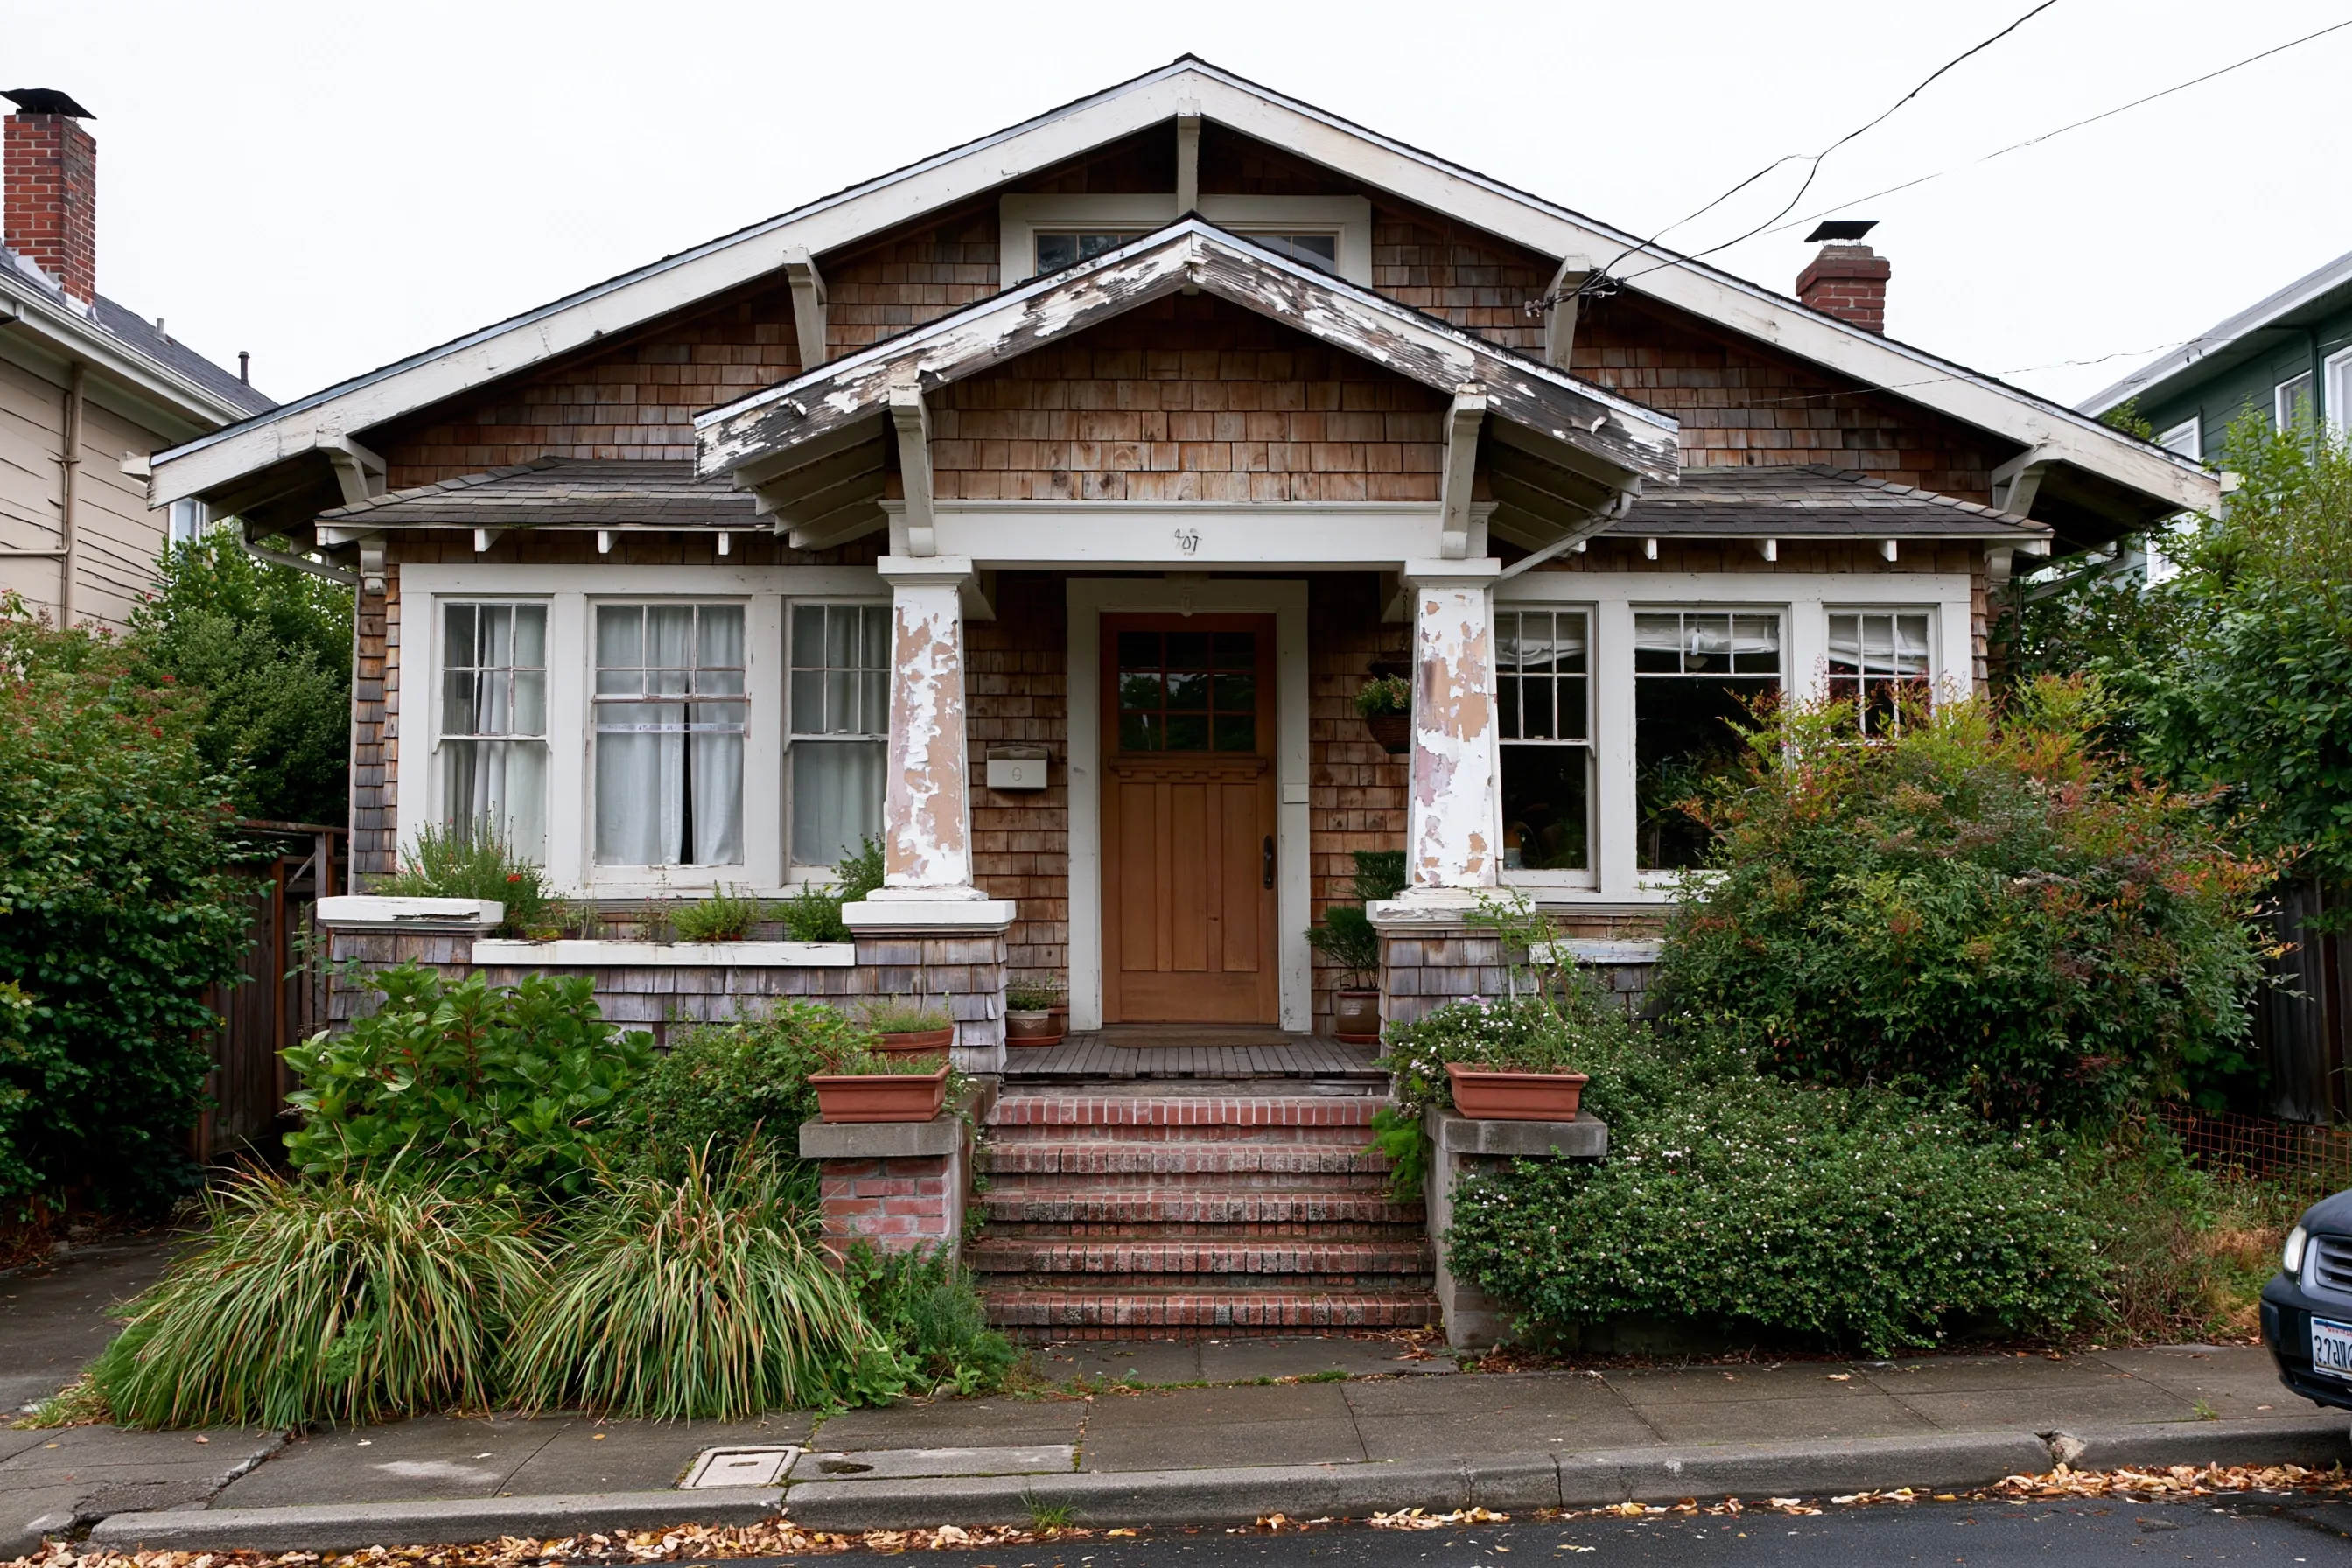
1920s craftsman bungalow with wood shingle siding, white porch columns with peeling paint and brick front steps
Home
1920s craftsman bungalow in Hayward with wood shingle siding and a front porch up brick steps
Original request
Get the peeling paint off the front porch for good
Testing
Lead paint on the two porch columns, the porch roof edge and its brackets; the shingle siding is bare wood
Surfaces
Two columns, the porch roof edge and the brackets, about 120 sq ft
Notice
CDPH Form 8551 posted and sent at least five days ahead; neighbors told in writing
Estimated cost
$3,100

Scope of work

Plastic over the brick steps and the planting beds, sheeting hung under the porch roof, the columns, roof edge and brackets stripped with paste stripper and wet scraping, waste bagged each day, primer and two coats of lead-free paint, and a clearance check of the steps and the ground. The window casings beside the porch are not part of this price.

Project overview

In this example, the owners of a 1920s craftsman bungalow in Hayward watch the white paint on the two front porch columns peel off in large flakes. A test shows lead paint on the columns, the porch roof edge and its brackets, while the shingle siding is bare wood and needs nothing.

They want the lead paint gone rather than painted over, so the job is abatement. Form 8551 is posted at the house and sent to CDPH at least five days ahead, and the neighbors are told in writing. Before work starts the owners ask the city’s Planning Division whether the address falls under its historic screening for older buildings.

The goal

The goal is a porch with no lead paint left on it and a front garden free of chips.

Process

  1. Notice Form 8551 posted and sent; letters to the neighbors.
  2. Setup Plastic laid over the steps and beds, sheeting hung under the porch roof.
  3. Stripping Columns, roof edge and brackets stripped wet, waste bagged daily.
  4. Paint Bare wood primed and given two coats.
  5. Clearance Steps and ground checked for chips and dust before the plastic comes down.

Planning right

  • Do not scrape or sand peeling porch paint dry. Chips fall straight into the garden beds.
  • Check the foot of each column for soft wood. Rotten wood is replaced at extra cost.
  • The window casings beside the porch may carry lead paint too. Test them before they are repainted.
  • File the clearance report with the permit and paint receipts for the house.
Get a free quoteMore about exterior lead paint removal

Peeling wood windows replaced in a 1930s shingle house

Example project

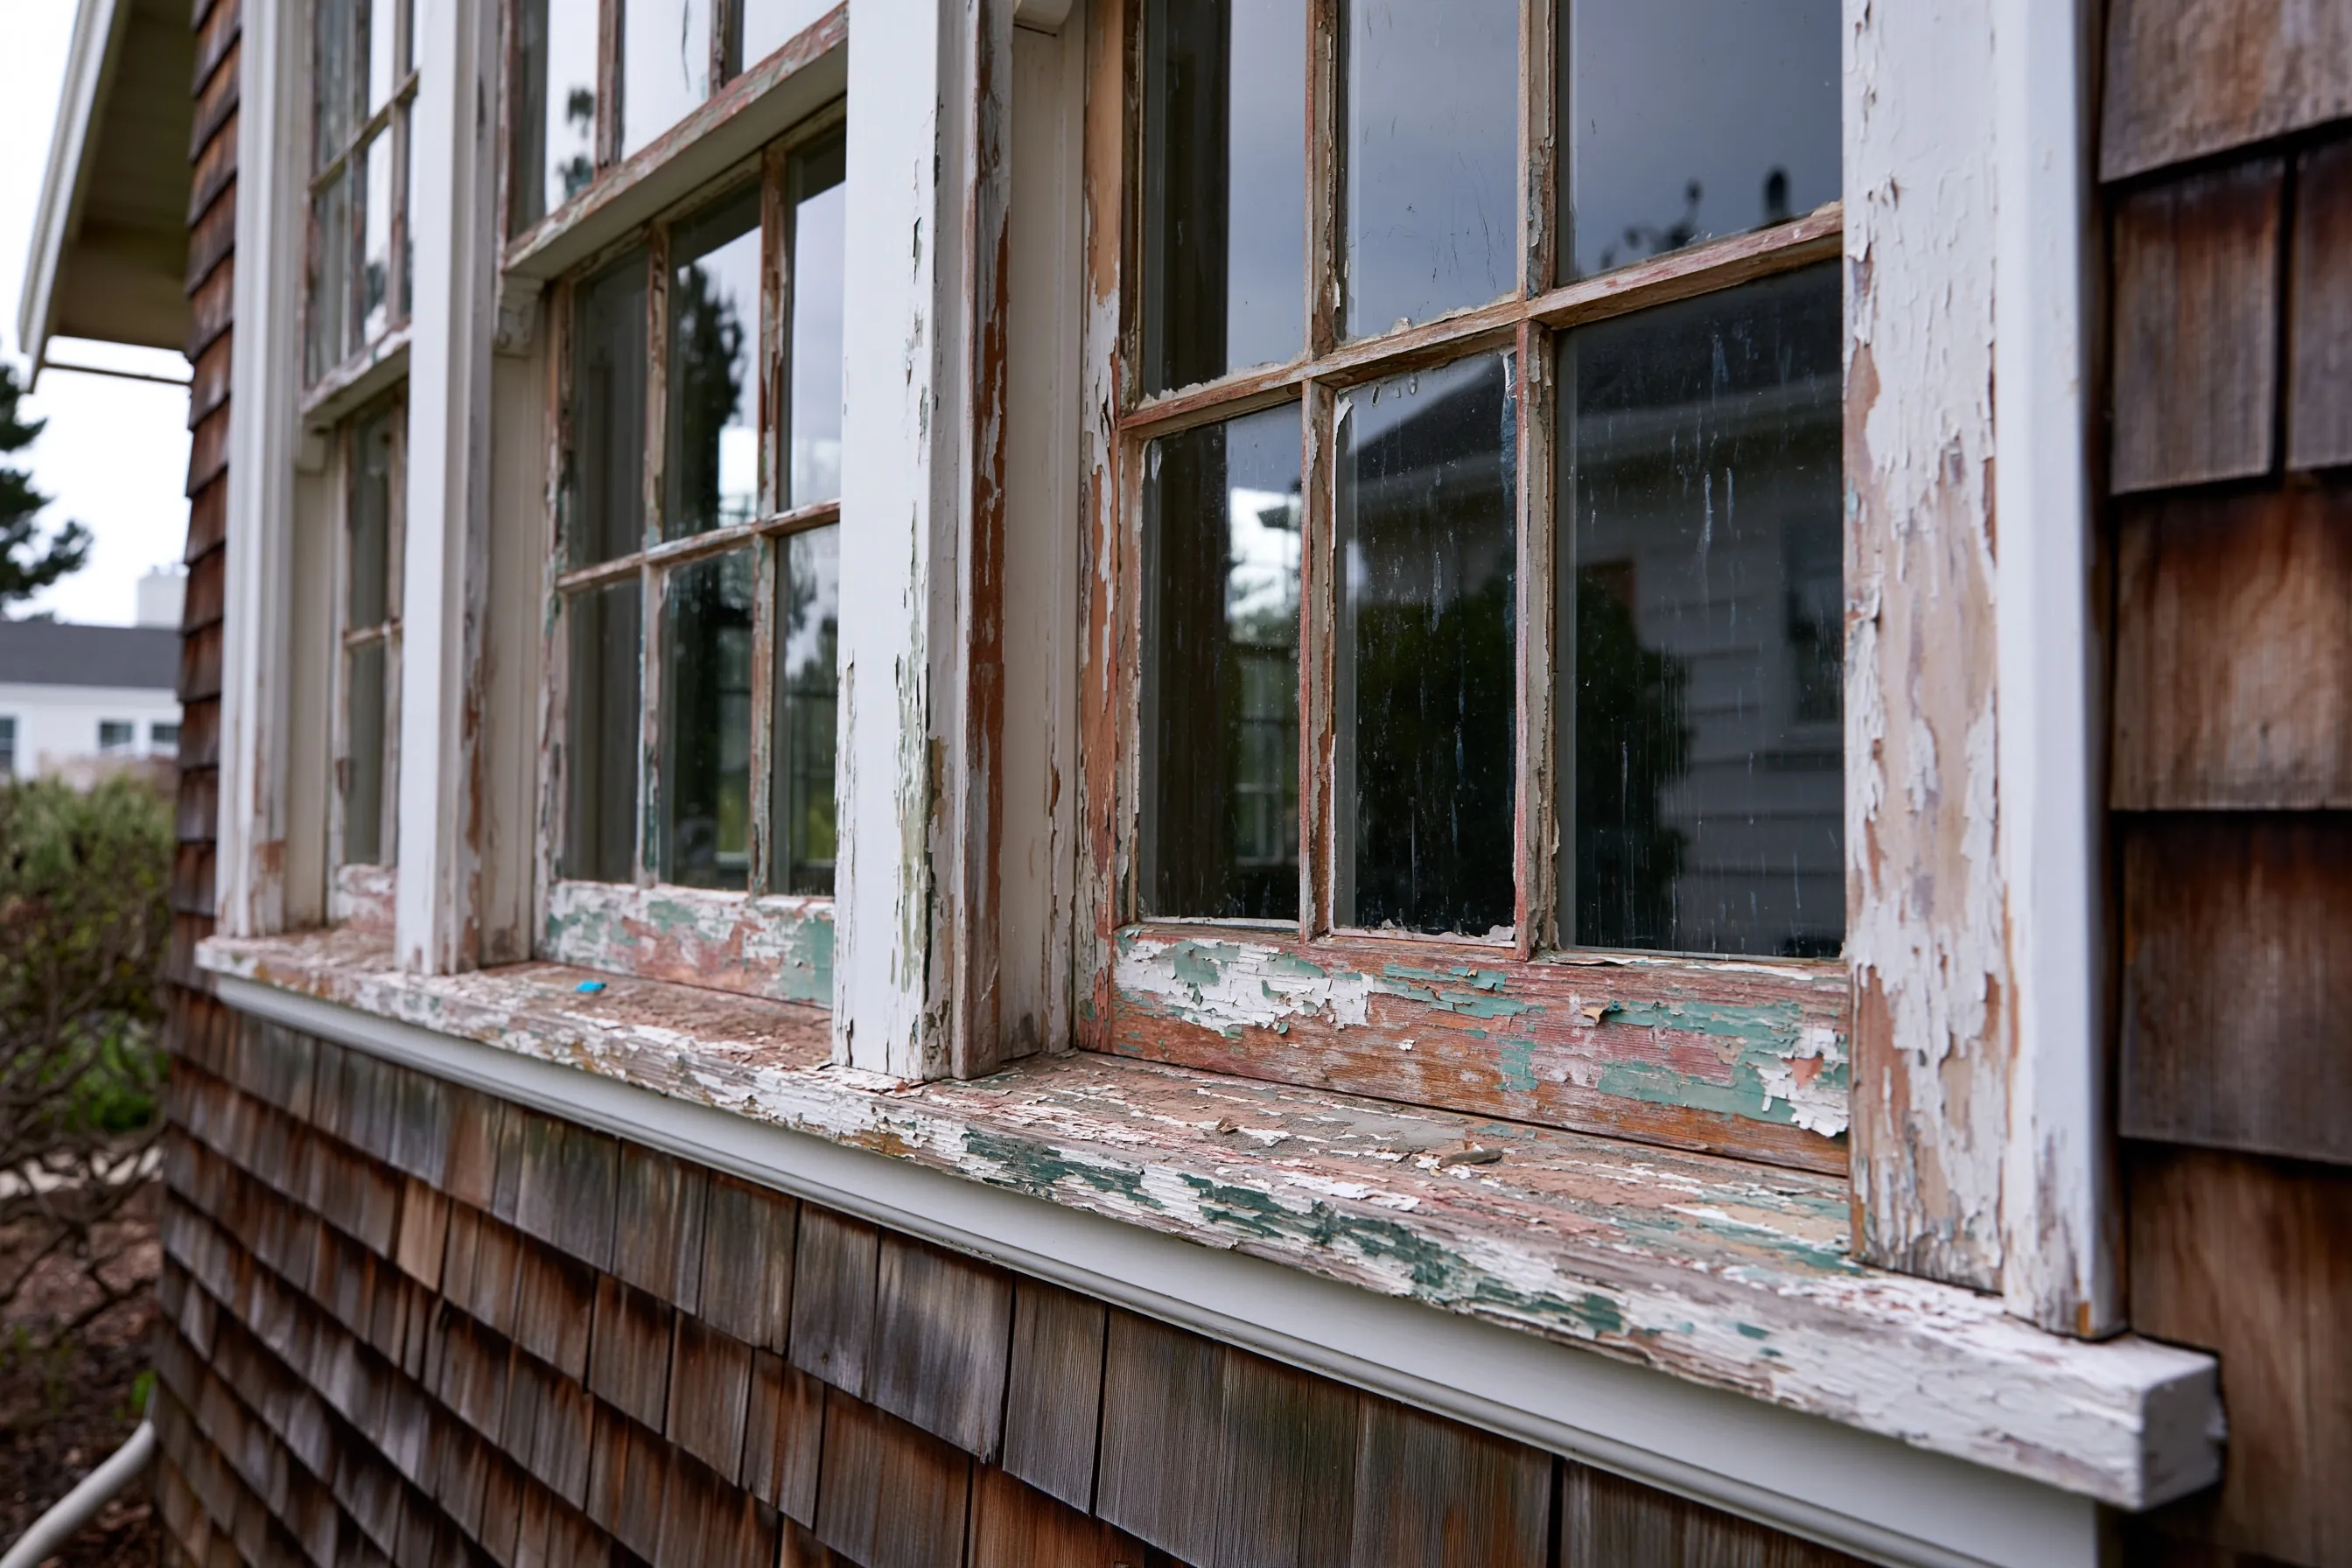
Old divided-light wood windows with flaking paint on the sills and sashes, set in wood shingle siding
Home
1930s house in San Leandro with wood shingle siding and wood windows
Original request
Replace the front windows, whose sills and sashes are peeling
Testing
Lead paint on the sashes, frames and sills; the shingles are bare wood
New windows
New units set in the existing openings, with the old casings kept
Permit
City building permit for the window replacement
Estimated cost
$3,300

Scope of work

Plastic inside each room and on the ground below each window, the old sashes and stops misted and taken out whole, new units set in the existing openings, the inside trim refitted, HEPA cleanup and a wet-cloth check of each sill and floor. The permit fee and the painting of the casings are not part of this price.

Project overview

In this example, the owners of a 1930s shingle house in San Leandro have front windows whose sills and sashes peel in layers of white and green paint. A test shows lead paint on the sashes, frames and sills, and the owners choose to replace the windows rather than strip them.

Window replacement in a house built before 1978 always falls under the federal lead-safe renovation rule, so each room is sealed and the ground outside is covered while the old windows come out. Hayward asks for a building permit for new windows, and the fee follows the value of the job.

The goal

The goal is sound new windows in the same openings, with no lead dust left in the rooms.

Process

  1. Testing Windows tested and each opening measured for its new unit.
  2. Permit Building permit applied for before the windows are ordered.
  3. Setup Plastic laid inside and outside around each window.
  4. Windows Old sashes out whole, new units set, inside trim refitted.
  5. Check HEPA cleanup and a wet-cloth check of the sills and floors.

Planning right

  • The city asks for a building permit when windows are replaced. Its fee is not in the price above.
  • Old sashes leave the house whole and wrapped, not dropped in a yard bin.
  • If the house might fall under the city’s historic screening for older buildings, ask the Planning Division before changing windows.
  • Casings left in place still carry the old paint. Repaint them lead-safe.

Get a free quoteMore about lead paint window and door removal

Lead-painted plaster walls and sill sealed in a 1940s room

Example project

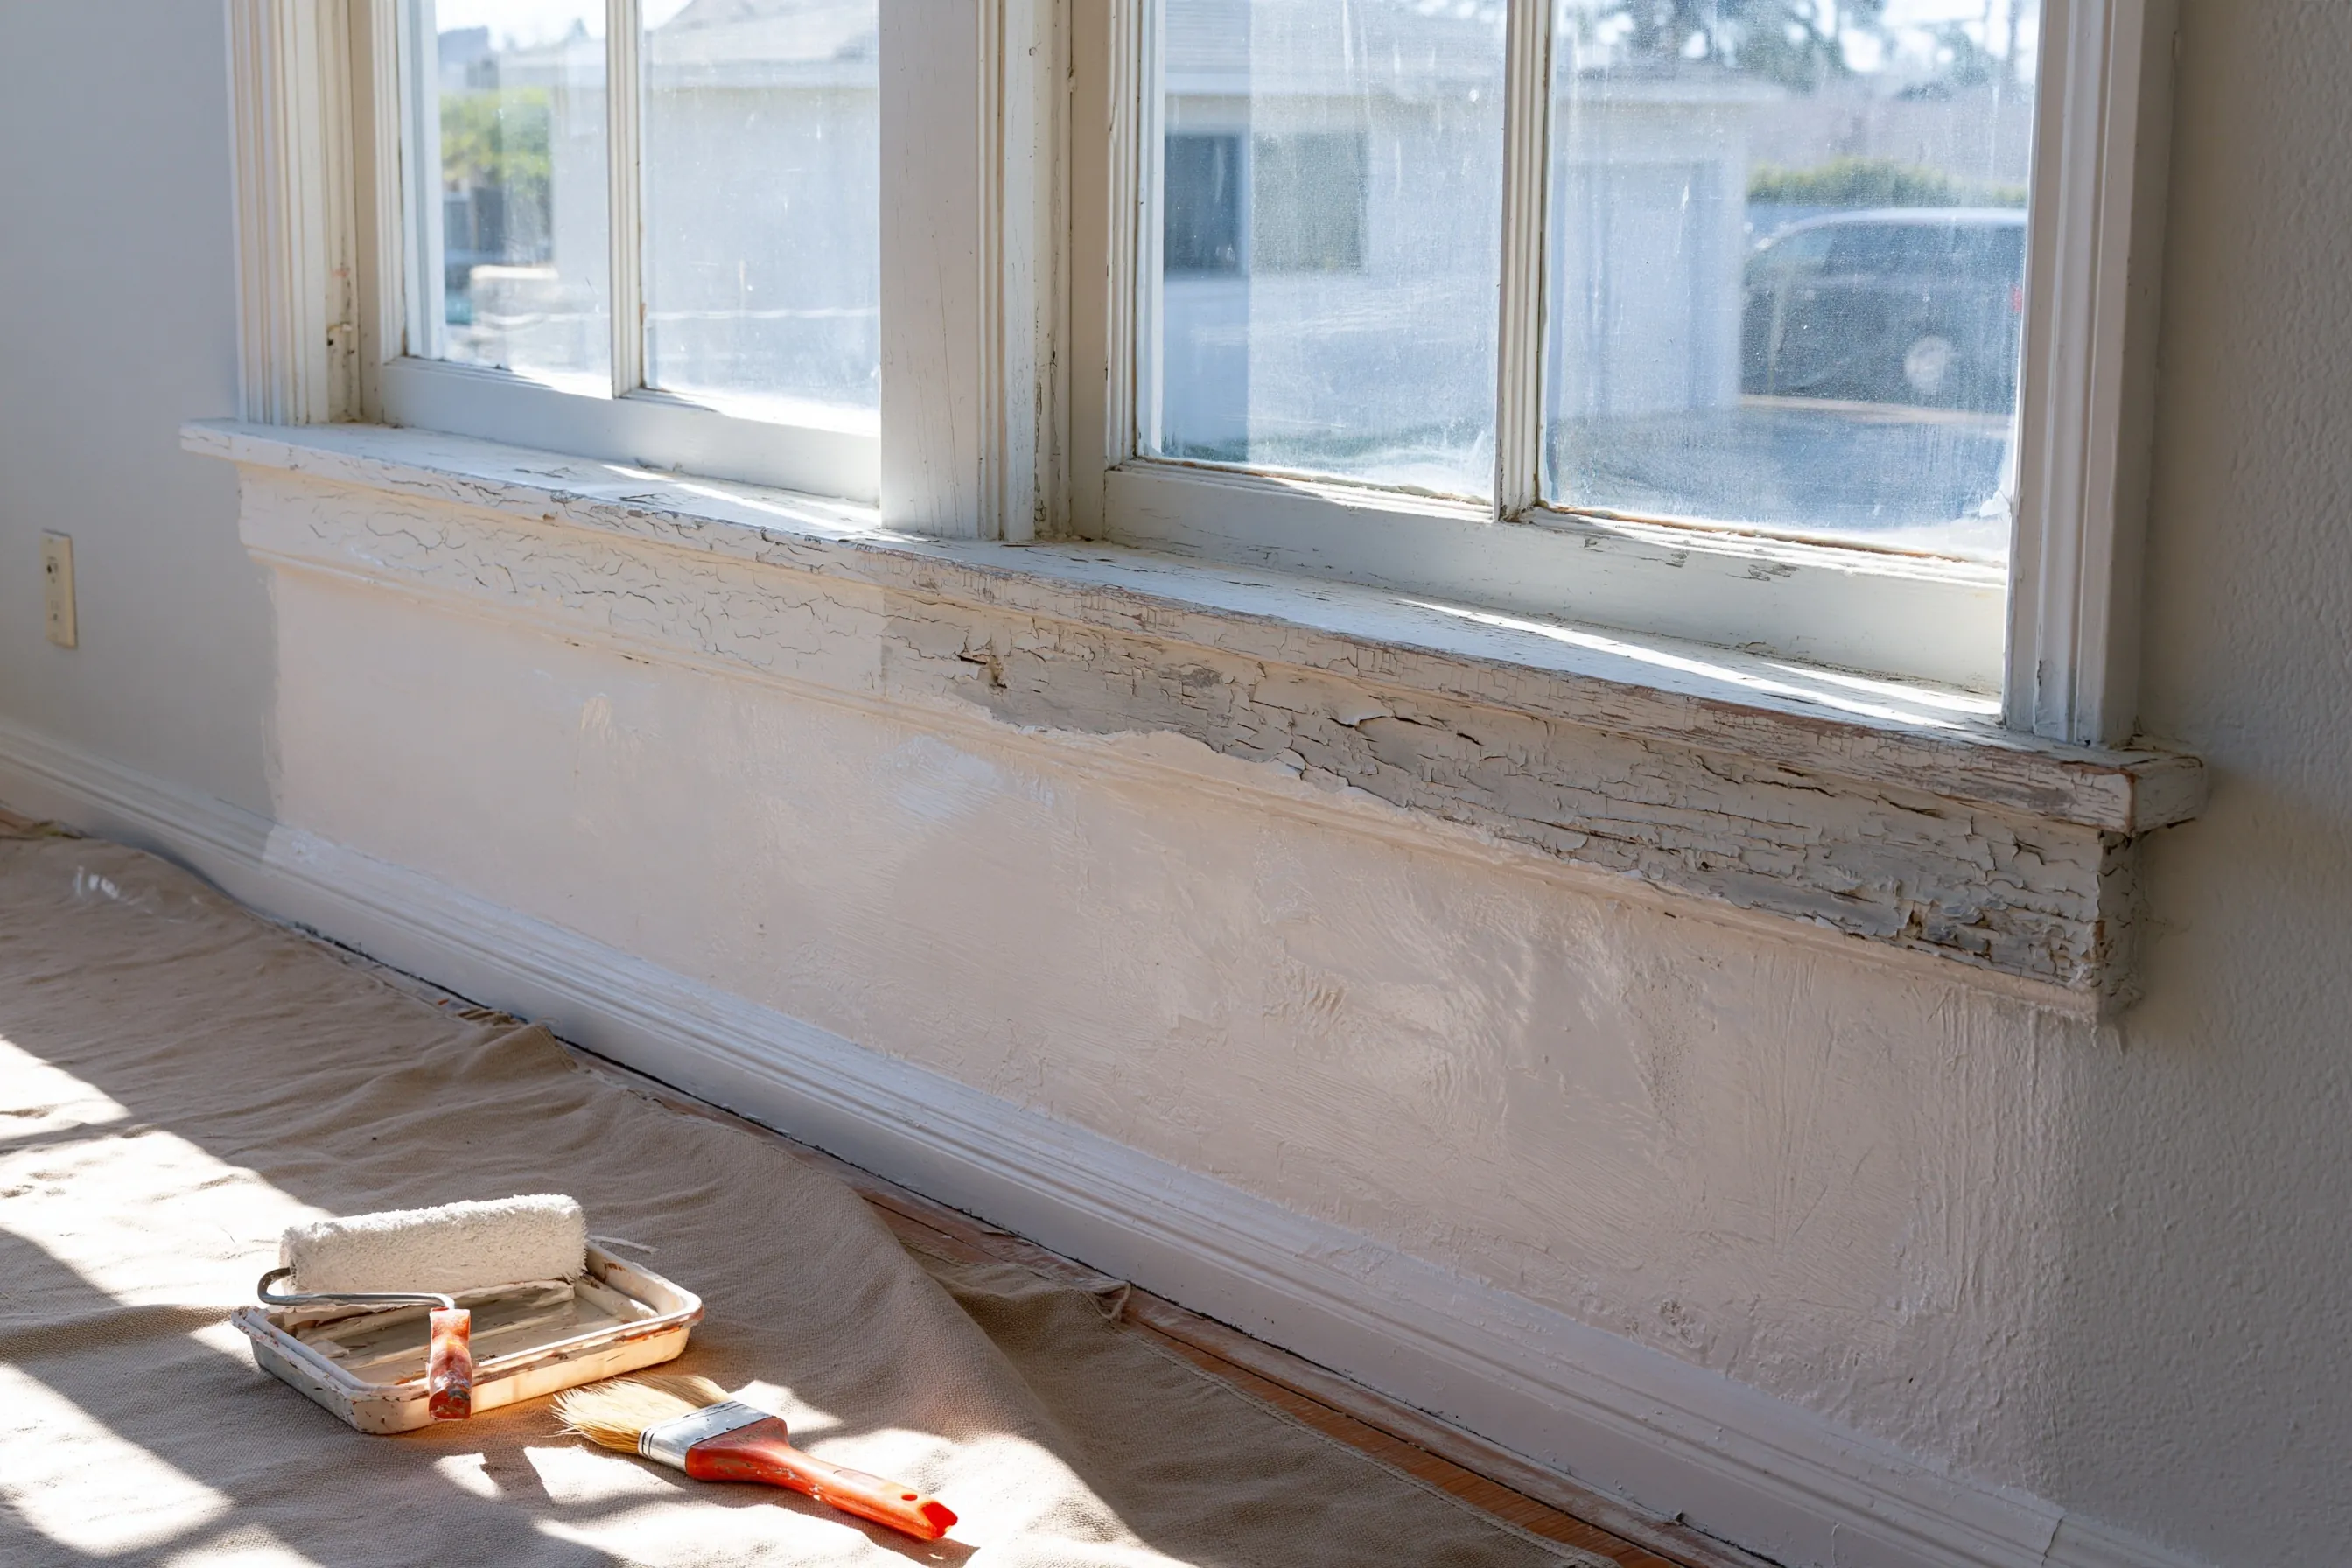
Older painted plaster wall below a cracked painted wood window sill, partly coated with encapsulant paint, tray and brush on a drop cloth
Home
1940s house in San Lorenzo with plaster walls
Original request
Hold the old paint in the back room until a remodel a few years from now
Testing
Lead paint on the plaster walls, the window sill and the apron; the wall paint is sound, the sill paint is cracked
Surfaces
About 280 sq ft: walls, sill, apron and baseboard
Method
Two coats of a coating made for a few years, so an interim control, not abatement
Estimated cost
$2,100

Scope of work

Plastic on the floor, the cracked paint on the sill and apron misted and scraped first, the walls washed, a bonding patch tested, two coats of a coating made for lead paint on the walls, sill, apron and baseboard, HEPA cleanup and a wet-wipe check. A coating made to last 20 years or more would add a written plan, a certified crew and a clearance test, and cost more.

Project overview

In this example, the owners of a 1940s house in San Lorenzo plan to remodel in a few years and want the back room safe until then. A test shows lead paint on the plaster walls, the sill and the apron. The paint on the walls is still firmly attached, while the paint on the sill is cracked and flaking.

Sealing the room keeps the plaster and costs far less than stripping it. The coating is made for a few years, which makes the job an interim control. Title 17 containment still applies, so the floor is covered, the loose paint is misted and cleaned up, and the room is wiped down at the end.

The goal

The goal is a room with its lead paint held behind a coating until the remodel.

Process

  1. Prep Floor covered, loose paint on the sill and apron misted and scraped.
  2. Patch test A small area coated to check the coating bonds to the old paint.
  3. Coating Two coats on the walls, sill, apron and baseboard.
  4. Check HEPA cleanup and a wet-wipe check of the floor and sill.

Planning right

  • The coating holds only as well as the old paint under it, which is what the small patch test shows.
  • Check the sealed walls for cracks or water stains each year.
  • Cutting into the wall at the remodel disturbs the lead again. Plan it lead-safe.
  • A coating made to last 20 years or more is abatement and is priced higher.

Get a free quoteMore about lead paint encapsulation

Lead test of a tract house before a bedroom is added

Example project

Home
1950s single-story tract house in Hayward, about 1,300 sq ft
Original request
Know where the lead paint is before a bedroom is added at the back
Testing
Readings on the window frames, door casings, cabinets, garage door and exterior trim, with chips sent to the lab
Found
Lead paint on the window frames, door casings and garage door; none on the interior walls
Report
A written report from a certified inspector the builder can price from
Estimated cost
$660

Scope of work

A visit to the whole house and the outside, readings on each type of painted part, paint chips to the lab where a reading is unclear, and a written report that lists each part as positive or negative.

Project overview

In this example, the owners of a 1950s tract house in Hayward plan to add a bedroom at the back. The new wall joins the old one, a window is moved and two doors are cut in, so the builder asks what the old paint contains.

The test shows lead paint on the window frames, the door casings and the garage door, and none on the interior walls. The builder can price lead-safe work for those parts and treat the walls the usual way.

The goal

The goal is an addition plan that knows where the lead paint is before the first cut.

Process

  1. Booking Build year confirmed and the addition plans shared with the inspector.
  2. Testing Readings on every type of painted part, with chips sent where a reading is unclear.
  3. Report Positive and negative parts listed, ready for the builder.

Planning right

  • Test before the builder prices the job, so lead-safe work is in the bid and not a surprise.
  • Cutting a new opening through painted wood falls under the federal lead-safe rules.
  • Whatever tests clear can be cut and fitted without special setup.
  • Keep the report with the permit papers for the addition.

Get a free quoteMore about lead paint inspection and testing

Lead-safe add-on to a hall bathroom remodel

Example project

Home
1950s single-story house in Hayward
Original request
Replace the tub, tile and window in the hall bathroom without spreading lead dust
Testing
Lead paint on the plaster walls, the door casing and the window trim
Room
One hall bathroom, closed off from the rest of the house
Lead-safe add-on
Room closed off with plastic, cuts misted, HEPA tools and a check of the room
Estimated add-on cost
$2,300

Scope of work

Plastic over the floor and across the doorway, misting of painted plaster and trim before each cut, HEPA vacuums on the cutting tools, daily HEPA vacuuming and a wet wipe, a cleaning check before the room reopens, and bagged disposal. The remodel itself, including the new window and the plaster repair, is priced separately.

Project overview

In this example, the owners of a 1950s house in Hayward are gutting the hall bathroom. Old tile comes off the walls, plaster is cut out around the tub, and the window and its trim are replaced. A test shows lead paint on the plaster, the door casing and the window trim.

Demolition and a window replacement disturb well over the minor repair limit, so the federal lead-safe rule applies: a certified firm and renovator, a sealed room and a cleaning check at the end. The extra cost is an add-on to the remodel, and the family keeps living in the rest of the house.

The goal

The goal is a remodeled bathroom with no lead dust left behind, with the extra cost limited to keeping the room clean.

Process

  1. Test Walls and trim tested before the contractor prices the job.
  2. Closing off Floor and doorway covered, the bathroom closed off before demolition.
  3. Tile and plaster out Tile and plaster misted and removed with HEPA-vacuum tools.
  4. Final check HEPA vacuuming, a wet wipe and the room checked before it reopens.

Planning right

  • Have the remodel bid name who seals the room and who cleans it.
  • Keep children out of the bathroom until it has passed its check.
  • The new window needs a city building permit. Its fee is not part of this add-on.
  • Plaster patching after the demolition disturbs paint again. Plan it lead-safe as well.

Get a free quoteMore about lead-safe renovation and remodeling

Leak-damaged ceiling and window wall repaired in a rented unit

Example project

Home
1950s fourplex in Hayward, one ground-floor unit
Original request
Fix the peeling ceiling and window wall after a roof leak, before a new tenant moves in
Testing
Lead paint on the plaster ceiling, the window wall and the window casing
Surfaces
About 100 sq ft of ceiling and wall in the unit’s living room
Report
A written report and a clearance test for the owner’s file
Estimated cost
$2,800

Scope of work

Plastic over the floor and the doorway, the peeling plaster paint misted and removed, the surface repainted, daily HEPA vacuuming and a wet wipe, a clearance test of the floor and sill, and bagged disposal. The roof repair and the plaster patching are priced separately.

Project overview

In this example, the owner of a 1950s fourplex in Hayward finds the ceiling and one wall of a ground-floor unit peeling after a roof leak. The unit is empty and a new tenant is due. A test shows lead paint on the plaster ceiling, the wall and the casing.

About 100 square feet is far more than the minor repair limit, so the lead-safe rules apply to paid work in a rented unit. The paint is removed with plastic, misting and HEPA tools, and a clearance test gives the owner a result to file.

The goal

The goal is a unit with a clean ceiling, a clearance result on file and a tenant who can move in.

Process

  1. Testing Ceiling, wall and casing tested before any scraping.
  2. Setup Floor and doorway covered, the unit closed off from the stairwell.
  3. Removal Peeling paint misted and removed, waste bagged.
  4. Clearance Cleaning, then a clearance test of the floor and sill.

Planning right

  • Fix the leak first, or the new paint peels again.
  • A pre-1978 lease brings the federal lead disclosure at each new tenancy.
  • Keep the test report and the clearance result in the unit’s file.
  • Other units in the building may have the same old paint. Test them before repainting.

Get a free quoteMore about rental property lead paint work

Request a free lead paint removal quote

Send the address and the year the building went up, and tell us which surfaces or rooms you have in mind and who lives there. We'll get back to you soon with an estimate or any questions we have. Estimates are free and there's no obligation.

Call (510) 576-5907

Call (510) 576-5907